For many years, coffee makers have become an essential part of our lives; for that reason, when they break down, it turns out to be almost a tragedy. However, here we want to help you so that your mornings do not get ruined. So, we bring you this guide to repair your Nespresso Coffee Maker at home yourself.
Because there is nothing more pleasant than starting our mornings with a delicious cup of coffee made at home. So take note and let’s start by analyzing all the parts of our coffee machine; as well as the possible faults and how to repair them.
Identifying the Nespresso Coffee Maker faults

Although there may be many reasons why our machine fails; what we will name here are the ones that we can solve easily at home, and without having to resort to an expert or wait long days for a response from the technician.
In addition, making these repairs at home does not just mean saving money; but you will become thoroughly familiar with your appliances, which will surely be of great help later on.
The most common faults are:
- Problems with the push buttons when ordering coffee
- The machine does not turn on or does not make coffee
- Water loss
- Calcification
These four common problems can have several causes and consequences; being that some relate to each other. Hence, there is a need to make a guide to learn to repair our coffee maker.
Let’s start with the simplest of all and move forward to cover all possible problems.
The pushbuttons do not respond or you have to touch them “hard”

That the buttons of our coffee maker do not react to the first press or what; in the worst case, we must push the button with force abusing the rubber. These are signs of mechanical failure and can be easily corrected with a little maintenance.
Identify the screws
The first step to repairing our Nespresso machine always identifies the type of screws with which the pieces are fixed. Many times, the screws vary according to the model and the manufacturer’s preferences.
This type of screws is not very easy to achieve; so we recommend you avoid using screwdrivers or any other element that is not correct. You must avoid mistreating the screws.
Once you have identified the right screwdriver, proceed to remove the screws in the cover corresponding to where the button is; in case they are lateral. If they are superior pushbuttons; then disarming the coffee maker will take a little more patience.
Remove the button

The button is very similar to the membranes of other electronic products such as computer or cellphone keyboards. This means that the accumulation of dirt can be a serious problem. That the buttons do not react with a correct response speed is indicative of excess dirt.
Once you have removed the button, clean the rubber on the inside with alcohol and helping with swabs. The same applies to the electrical part; you must clean that area of the pulsator with a swab and alcohol.
The excess of dirt creates a layer that avoids the electrical conduction and, therefore; obstructs the signals. With this simple maintenance, you will be able to solve it.
The machine does not turn on or does not make coffee
The failure that scares us all and that worries us the most when in the morning we go to have our coffee and suddenly nothing happens.

This is undoubtedly the problem that most requires us to care when resolving; then we must remove all the screws of the coffee machine to access the plate and observe the electrical circuit well.
For that reason, here we leave you two videos where you will learn how to make homemade; the necessary tool to remove the screws from the coffee machine.
This first is one to get out of the fast step using materials that you will surely have at home. It does not take long to make it, so it’s perfect to repair the coffee machine in the morning if you do not have much time.
And in this other video, you can see how to make a more solid and durable tool that will help you get back these screws.
The important thing is that, although there is the possibility of removing the screws with pliers or pliers; preferably do not do it. The screws of the Nespresso machine are very delicate; what you least need is to damage its original shape.
The green LED of the machine remains blinking

Returning to the main topic, when our coffee machine does not turn on properly; the warning signs are clear. One of the first is the operation of the power LED. This green LED usually blinks weakly and even blinks when the machine is not booting properly.
Faced with this failure, it is impossible to prepare our coffee. It may be a serious problem of electronics; so let’s see how we check and discard it. Remember that some faults are virtually impossible to repair at home if you do not have the right instruments and tools.
Replace the nano farad 470 condenser
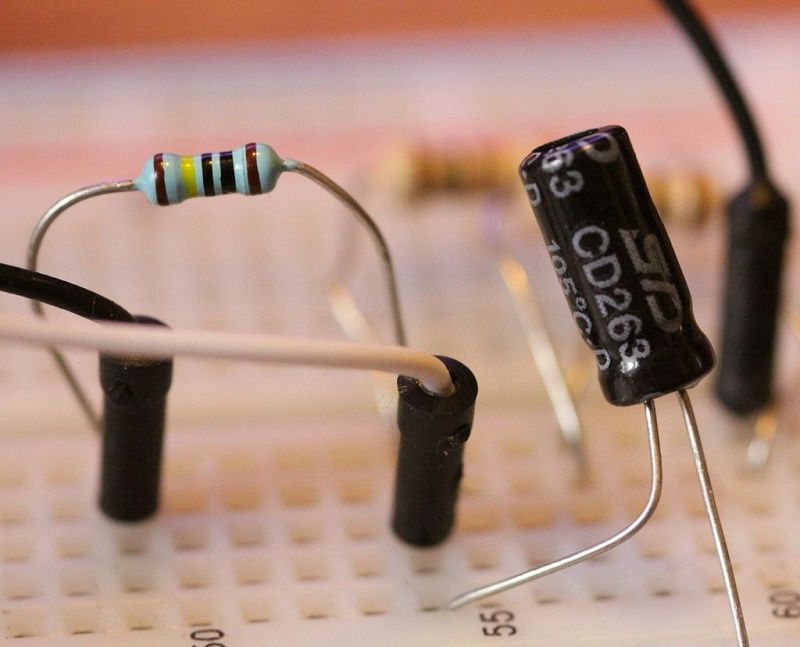
You will notice that when you open your coffee machine and access the electronic plate; There are two capacitors. The principle that is much larger than the auxiliary; is the one that usually gives this problem, causing the machine not to work properly.

To replace it, the first thing you should do is download it. Use the tip of the screwdriver and the tip of the soldering iron to make contact with the terminals of the condenser and thus remove the entire load quickly; otherwise, you must wait at least 3 hours.
Now you just have to cut the capacitor terminals and, if you look closely; you will notice that the value they use is 470 nano farad. However, our recommendation is that, when you go out and buy a new one, you buy one of 680 nano farad. Especially if you drink coffee every day at home.
Soldering the capacitor is very simple, you should only use tin and soldering iron; Of course, if you do not know how to do it, then it is best to bring your coffee to repair.
Water loss

This failure arises due to several possible problems. Unfortunately, some of these problems have no repair. So, we will be very clear at this point, so you will not waste time trying to repair it at home.
You can get it repaired with a technician, but that will involve a change of specific pieces that are very difficult to obtain.
The sieve has been covered

The sieve is one of those extremely vital and undervalued pieces of our coffee maker. Many people have damaged their coffee makers because of the poor handling of this piece; so it is important that you pay close attention to the following explanation.
The main thing is to know that, although they seem few or very close, the holes in the screen are enough; Do not make holes wider or try to open new ones.
The sieve can be cleaned with an old toothbrush without any problem, but, since this is about repairing our coffee machine at home; we ask you please do not disassemble the piece to do this type of maintenance if it is not extremely dirty.
Clean the screen and let the water run. Repeat the process until you see that the water loss is over.
Check the machine without capsule

The sound produced by the pump is a great sign of calcification, for that reason; We recommend that you put your machine to work, but first remove the capsule.
If you do not see any kind of spill, then we can skip to the next check; however, if you notice a strange sound and some spill, then you may be facing a problem of calcification; Later we will explain how to solve it.
Check if the capsule has been perforated
Another of the many breakdowns that often happens a lot is that; Although the coffee maker does not make any unusual noise, when we try to serve ourselves a cup of coffee, it serves us more water than the coffee itself.
That is when it is time to check if the coffee capsule is being effectively pressed and perforated. If this is not happening; Then the problem is the whole press area capsules of our coffee maker. This problem, unlike many others; it is not something that you can easily solve and usually requires a spare. If this is the problem, you should ask for a quote; Well, depending on your model of Nespresso coffee machine, this piece can be even more expensive than a new coffee maker.
Calcification

The decalcification of our machine is a vital process that we must apply every moment. So, often to prolong the life of it.
Unfortunately, it is a problem that often occurs very often and Nespresso is aware of it; So there is a decalcification kit created by them.
This does not mean that you should specifically use that kit; although if you do, you will not be breaking any rule of the coffeemaker’s warranty, so it is convenient to buy the kit if you are still within that range.
However, here we will explain two methods to solve this problem.
Using the Nespresso kit
The kit brings two doses because the recommended time to perform the decalcification process is 6 months, the kit is enough to take care of our coffee maker for a whole year.

Before starting the process, verify that there are no coffee tablets inside. Then, be very careful when handling the product; It is identified with the warning to be toxic.
In the same way, you should clean your coffee maker very well after carrying out this process to avoid illnesses.
Turn on your coffee maker and let it warm, pour half a liter of water into the tank and; Place the decalcifying liquid in the container.
During this time, surely your coffee will have finished heating. Now, you must enter the cleaning mode; to do this, simultaneously press both buttons of your coffee maker for three seconds.
You will notice that both buttons will light intermittently, and here comes the last step. You must place a liter container and let the coffee maker do its job. The machine will expel all the liquid; with which you will have to do another cycle.
Once you finish the second cycle, discard the water with chemical liquid and pour a liter of running water. Press the coffee button again to clean the machine using all the water you have placed this time and, when you finish the process; press both buttons of the coffee machine again to exit cleaning mode.
It uses vinegar and bicarbonate for decalcification

This method is as effective as the previous one and much cheaper; besides that, you can do it in the mornings if you notice spills of water.
The process is practically the same in terms of cycling. The only thing that you should vary at this point is the product to be placed in the water container.
You only need to use half a liter of vinegar and ½ teaspoon of baking soda. You can use apple cider vinegar and; If you prefer, instead of going into the cleaning cycle, another option is to load the machine with vinegar and let the solution decalcify the interior.
In any case, this second method is only necessary if it has been a long time since you did a maintenance to your Nespresso Coffee Maker; which is not recommended.

