

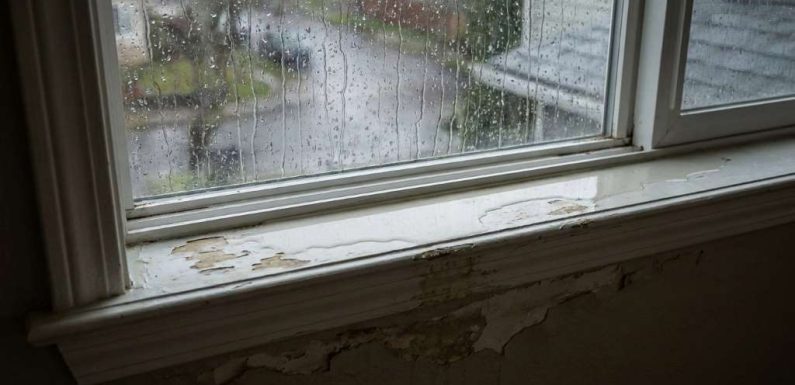
To stop window leaks in Seattle, WA, first identify where water enters, then repair the failed seal, flashing, or drainage path. Seattle averages about 35 inches of annual precipitation, making small window defects costly over time. The city also recorded roughly 41 inches during 2022, showing how sustained wet weather can expose weak openings. If the glass itself has failed, window glass pane replacement may solve the problem.
Start With the Leak, Not the Caulk
A window leak rarely starts where you first notice dripping water. Instead, water can travel behind siding, trim, insulation, or interior drywall before appearing indoors.
Therefore, inspect the entire window assembly before applying sealant. Look for damaged flashing, cracked exterior joints, failed glazing, blocked weep holes, and deteriorated trim.
Seattle’s long wet season makes these weaknesses especially important. A seal that survives occasional rain may fail when repeated moisture keeps the surrounding materials damp.
Before repairing anything, document the leak during rainfall. Note where water first appears, how quickly it spreads, and whether wind changes its direction.
Check These Areas First
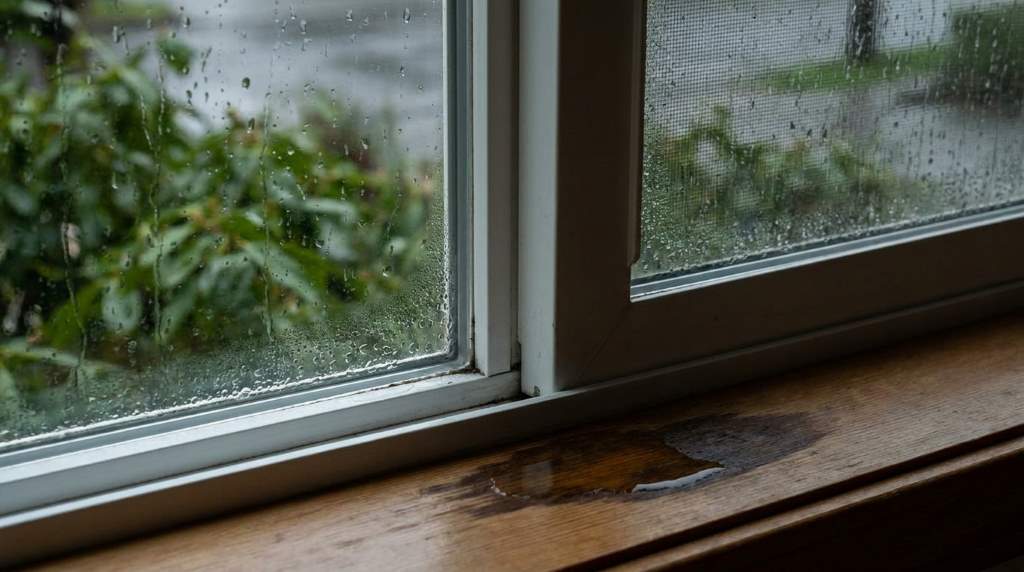
Begin your inspection outside because exterior defects often create interior symptoms. Work systematically from the roofline downward toward the window sill.
- Window head flashing: Check for gaps, corrosion, lifting, or missing components.
- Side jambs: Inspect caulk joints and siding transitions for openings.
- Window sill: Look for standing water, cracks, rot, or blocked drainage.
- Weep holes: Make sure factory drainage openings remain completely clear.
- Glass and glazing: Inspect seals for cracks, movement, or visible deterioration.
- Interior trim: Check paint bubbling, staining, swelling, or soft wood.
Find the Real Source Before Repairing It
Many homeowners blame the window when the actual source sits above it. Roof runoff, damaged siding, and failed flashing can send water toward the window opening.
For example, an aging roof can develop vulnerabilities around penetrations and nearby transitions. Understanding architectural shingle roof lifespan can help determine whether roof deterioration deserves inspection.
Next, examine the wall above and beside the window. Look for staining, loose siding, cracked joints, deteriorated trim, or darkened materials.
Do not seal an active leak before finding its pathway. Caulk can hide symptoms temporarily while trapped moisture continues damaging materials behind the wall.
Use a Controlled Water Test
A controlled hose test can help locate a difficult leak. Always use low water pressure and test one small area at a time.
Start near the bottom and gradually move upward. If water appears inside after testing one section, inspect that area carefully before continuing.
Never spray directly into drainage openings or force water behind siding. Excessive pressure can create leaks that normal rainfall would never cause.
Repair Exterior Seals and Drainage Correctly
Once you locate the entry point, remove failed sealant before installing new material. New caulk rarely bonds reliably over loose, dirty, or deteriorated old sealant.
Clean the joint thoroughly and allow damp surfaces to dry. Then choose an exterior sealant designed for the window material and local weather exposure.
However, do not use caulk as a substitute for flashing. Flashing directs water away from vulnerable joints, while sealant mainly closes smaller surface gaps.
If the leak connects with roofing materials, investigate the roof transition carefully. Reviewing signs of roof damage can reveal problems above the window.
Keep Window Drainage Open
Modern windows often include weep holes that release water from internal drainage channels. Blocking these openings can force water toward the interior.
Inspect the sill area for dirt, paint, leaves, or hardened sealant. Remove debris carefully without enlarging or damaging the original openings.
Never caulk over factory drainage paths simply because they look like gaps. Those openings may perform an essential part of the window’s water-management system.
Fix Flashing When Caulk Cannot Solve the Problem
Flashing deserves special attention when leaks recur after repeated caulking. A failed flashing detail can allow water behind the window frame and surrounding wall materials.
Check the head, jamb, and sill transitions for proper water-shedding paths. The exterior should move water outward instead of trapping it around the opening.
Roof flashing can also influence window leaks when upper roof surfaces drain toward the wall. For related prevention principles, review roof flashing failure prevention.
If flashing sits behind siding, the repair may require partial siding removal. That approach costs more effort, but it can address the actual water pathway.
Signs That Flashing Needs Attention
- Water appears after heavy or wind-driven rain.
- Caulk repairs work briefly before leaks return.
- Staining appears above the window frame.
- Siding remains wet around the opening.
- Exterior trim shows swelling or dark discoloration.
- Water appears even when the glass remains intact.
Know When the Glass or Window Unit Has Failed
Not every leak comes through the wall assembly. Sometimes damaged glazing, failed seals, or deteriorated window components allow water directly through the unit.
Inspect the glass edges and frame carefully for cracks or separation. Also check whether the sash closes evenly and compresses its weatherstripping.
If insulating glass has failed, condensation between panes may indicate a compromised seal. That issue differs from rainwater intrusion, but both problems can involve deteriorated window components.
Older windows may also have warped frames or degraded materials. In those situations, replacing individual sealant joints may provide only a temporary improvement.
Repair or Replace?
Choose repair when the frame remains structurally sound and the problem involves accessible seals or drainage. Consider replacement when rot, warping, persistent water entry, or extensive deterioration affects the assembly.
A professional assessment makes sense when water reaches insulation or drywall. Hidden moisture can create larger repair requirements than the original window problem.
Prevent Window Leaks Before Seattle’s Wet Season
Leak prevention works best when you inspect windows before heavy rainfall exposes weaknesses. A short seasonal inspection can reveal small defects while repairs remain manageable.
Start with exterior caulk, flashing, drainage openings, siding transitions, and visible trim. Then inspect interior corners, drywall, flooring, and nearby baseboards.
Trim vegetation away from walls where practical. Better access improves inspections and helps you spot deteriorating exterior materials earlier.
A Simple Seasonal Checklist
- Inspect exterior sealant for cracks and separation.
- Clear window weep holes without damaging them.
- Check flashing around windows and nearby roof areas.
- Inspect siding joints for openings or movement.
- Look indoors for stains, bubbling paint, or swelling trim.
- Test suspicious windows during controlled rainfall conditions.
- Schedule professional inspection when leaks repeatedly return.
What Not to Do When a Window Leaks
Quick fixes often create bigger problems when they ignore the water pathway. Avoid sealing every visible gap without understanding how the assembly drains.
Do not cover weep holes with caulk, paint, or expanding foam. These openings can help remove water that enters the window’s internal drainage system.
Also, avoid interior-only repairs when water continues entering from outside. Fresh paint can hide staining while moisture remains active behind the finished surface.
Finally, do not ignore recurring leaks after successful-looking repairs. Repeated water intrusion usually signals an unresolved defect elsewhere in the assembly.
When to Call a Window or Building Professional
Some window leaks require more than basic maintenance. Professional help becomes appropriate when water reaches concealed building materials or repairs repeatedly fail.
Call a qualified professional when you notice structural wood damage, extensive rot, persistent interior moisture, or suspected wall penetration. You should also seek help when flashing requires siding removal.
Professionals can trace water pathways that remain difficult to identify visually. They can also distinguish window failures from roofing, siding, and wall-envelope problems.
Act Quickly on These Warning Signs
- Soft or crumbling wood surrounds the window.
- Drywall repeatedly becomes wet after rain.
- Musty odors develop near the opening.
- Staining expands beyond the original leak area.
- Water enters during ordinary rainfall after repairs.
- The window frame moves, bows, or shows severe deterioration.
Build a More Reliable Window Leak Strategy
The most effective repair follows the water’s path instead of treating the visible symptom. Start outside, inspect drainage, verify flashing, and then examine the window itself.
Next, repair the failed component rather than applying unnecessary layers of sealant. That approach protects the wall assembly and reduces repeated maintenance.
Seattle’s wet climate rewards preventative maintenance because small exterior failures receive frequent moisture exposure. Regular inspections therefore cost less than repeatedly repairing damaged interior finishes.
When you combine proper drainage, sound flashing, durable seals, and timely repairs, window leaks become far easier to control.
Conclusion
To stop window leaks in Seattle, WA, identify the water pathway before choosing a repair. Inspect flashing, drainage, siding, seals, glazing, and nearby roofing rather than blaming the window immediately.
Start with a careful exterior inspection and controlled water testing when necessary. Then repair damaged components and monitor the area through subsequent rainfall.
If leaks persist, contact a qualified window or building-envelope professional before moisture spreads into hidden materials. Taking action early can protect your window, wall assembly, insulation, and interior finishes.
Frequently Asked Questions
What is the most common cause of window leaks?
Failed exterior seals, flashing problems, blocked drainage, and deteriorated surrounding materials commonly cause window leaks.
Can caulk stop a leaking window?
Caulk can stop minor joint leaks, but it cannot correct defective flashing, drainage, framing, or roof problems.
How can I tell whether rain enters through the window?
Use controlled water testing while checking nearby roofing, siding, flashing, and wall joints for alternative entry points.
Should I replace a window that leaks?
Replace the window when structural deterioration, persistent failure, or severe frame damage makes localized repair impractical.
How often should Seattle homeowners inspect windows?
Inspect windows at least twice yearly and after major storms or whenever interior moisture appears.
