
Roof flashing protects your home from water damage. However, when flashing fails, it can lead to costly repairs and structural problems. Understanding how to prevent flashing failure saves you money and preserves your home’s integrity. This guide explores effective strategies to keep your roof flashing in excellent condition.
Understanding Roof Flashing and Its Importance
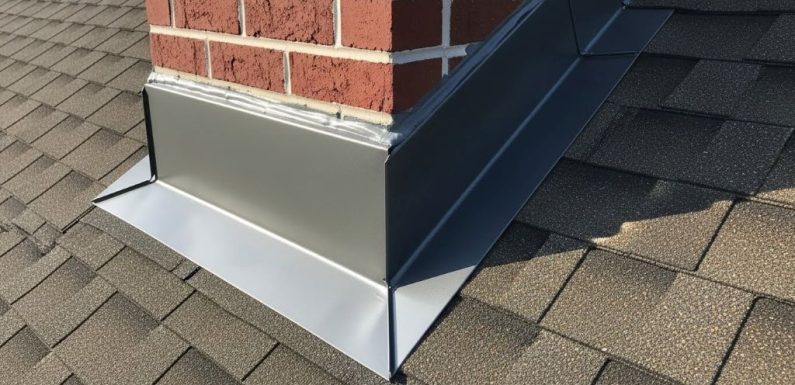
Roof flashing consists of thin metal pieces installed at joints and valleys on your roof. These components redirect water away from vulnerable areas. Additionally, flashing prevents moisture from seeping into your home’s structure.
Flashing appears around chimneys, skylights, vents, and wall intersections. Without proper flashing, water penetrates these openings and causes significant damage. Therefore, maintaining your flashing system is essential for protecting your investment.
Common Causes of Flashing Failure
Several factors contribute to flashing deterioration over time. Recognizing these causes helps you take preventive action before problems escalate.
Weather exposure ranks among the top culprits. Rain, snow, wind, and UV rays constantly attack flashing materials. Over time, this exposure weakens the metal and compromises its protective function.
Poor installation also leads to premature failure. When contractors rush the job or lack experience, they may create gaps or use incorrect materials. Consequently, water finds entry points that shouldn’t exist.
Age naturally affects flashing performance. Most flashing materials last between 20 and 30 years. However, harsh climates can shorten this lifespan considerably.
Corrosion develops when incompatible metals touch each other. For example, aluminum flashing against copper creates a chemical reaction. This process gradually eats away at the metal surface.
Signs Your Roof Flashing Needs Attention
Early detection prevents minor issues from becoming major disasters. Watch for these warning signs throughout the year.
Water stains on ceilings or walls indicate moisture intrusion. These marks often appear near chimneys or in corners where walls meet the roofline. Additionally, you might notice peeling paint or wallpaper in these areas.
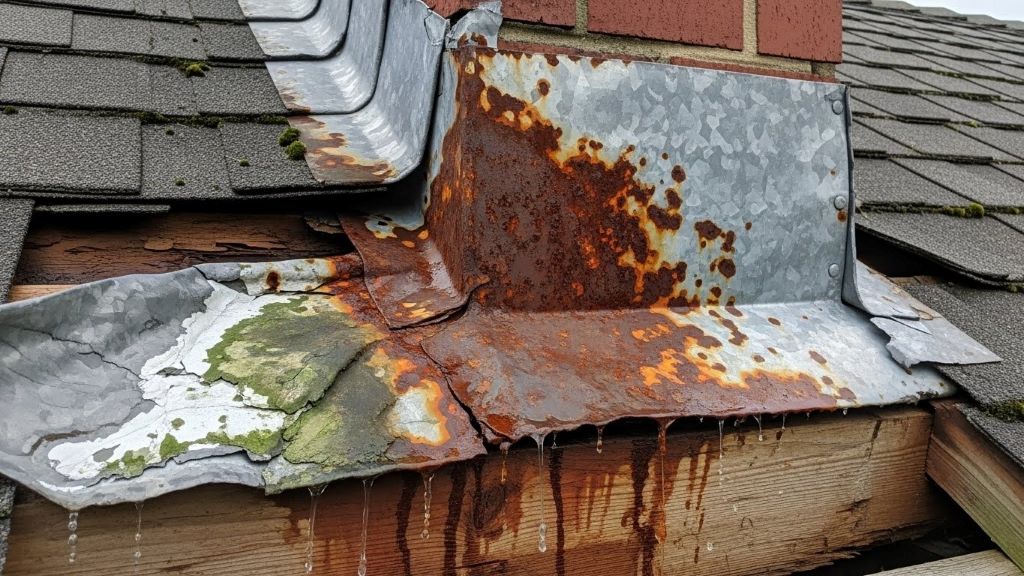
Rust spots on flashing signal deterioration. When you see orange or brown discoloration, the protective coating has worn away. This leaves the underlying metal vulnerable to further damage.
Bent or damaged flashing requires immediate repair. Strong winds can lift flashing edges, while falling branches may dent or puncture the material. Moreover, loose flashing allows water to flow underneath.
Missing sealant around flashing creates gaps. The caulk that seals flashing edges deteriorates over time. Therefore, regular inspection helps you spot these openings before leaks develop.
Preventive Maintenance Strategies
Regular maintenance extends flashing lifespan and prevents expensive repairs. Implementing these strategies protects your home year-round.
Schedule professional inspections twice annually. Spring and fall serve as ideal times to assess your roof’s condition. Trained professionals spot problems that homeowners often miss.
Clean gutters and downspouts regularly. Clogged drainage systems cause water to back up under flashing. This prolonged moisture exposure accelerates deterioration and promotes rust formation.
Trim overhanging tree branches near your roof. Branches scraping against flashing gradually wear away protective coatings. Furthermore, falling limbs can cause immediate damage during storms.
Remove debris from roof valleys promptly. Leaves, twigs, and other materials trap moisture against flashing. This creates perfect conditions for corrosion and rot.
Apply fresh sealant as needed. Check caulked areas around flashing every few years. When you notice cracks or gaps, reapply high-quality roofing sealant immediately.
Choosing Quality Flashing Materials
Material selection significantly impacts flashing longevity. Understanding your options helps you make informed decisions during installation or replacement.
Copper flashing offers exceptional durability and aesthetic appeal. This premium material resists corrosion and lasts up to 70 years. However, copper costs more than other options initially.
Galvanized steel provides good protection at reasonable prices. The zinc coating prevents rust for many years. Nevertheless, this coating eventually wears away in harsh environments.
Aluminum flashing works well in coastal areas. Salt air doesn’t corrode aluminum as quickly as steel. Additionally, aluminum remains lightweight and easy to work with during installation.
Lead-coated copper combines durability with flexibility. This material conforms to complex roof shapes while maintaining excellent water resistance. Therefore, it suits intricate architectural designs particularly well.
Professional Installation Best Practices
Proper installation prevents most flashing failures. Working with experienced contractors ensures your flashing performs as intended.
Qualified roofers understand building codes and manufacturer specifications. They know correct overlap measurements and fastening techniques. Moreover, professionals use appropriate tools and materials for each application.
Quality contractors never skip crucial steps. They prepare surfaces properly before installing flashing. This includes cleaning areas thoroughly and applying primer when necessary.
Experienced installers create proper drainage paths. They angle flashing correctly to direct water away from vulnerable spots. Additionally, they ensure adequate overlap at seams and joints.
Reputable companies stand behind their work with warranties. These guarantees provide peace of mind and protection against installation defects. Furthermore, warranties often cover both materials and labor.
When to Replace Versus Repair Flashing
Knowing whether to repair or replace saves time and money. Consider these factors when making your decision.
Minor issues often respond well to repairs. Small rust spots, loose fasteners, and minor sealant gaps typically require simple fixes. These repairs extend flashing life without major expense.
Extensive damage warrants complete replacement. When corrosion covers large areas or holes penetrate the metal, repairs prove inadequate. Similarly, severely bent or kinked flashing cannot perform properly even after straightening.
Age influences the repair versus replace decision. Flashing approaching the end of its expected lifespan deserves replacement during roof work. This prevents future problems and ensures comprehensive protection.
According to the National Roofing Contractors Association, proper flashing installation and maintenance significantly reduce the risk of water damage. Their research emphasizes the importance of professional installation and regular inspections.
The Role of Ventilation in Flashing Performance
Adequate attic ventilation supports flashing longevity. Understanding this connection helps you maintain your entire roofing system.
Poor ventilation traps heat and moisture in your attic. This environment accelerates flashing deterioration from the inside out. Consequently, rust forms faster even on quality materials.
Proper airflow keeps attic temperatures moderate. This reduces thermal expansion and contraction that stresses flashing connections. Additionally, good ventilation prevents condensation buildup.
Installing ridge vents and soffit vents creates effective air circulation. These components work together to exhaust hot air while drawing in fresh air. Therefore, your flashing experiences less extreme temperature fluctuations.
Seasonal Considerations for Flashing Care
Different seasons present unique challenges for roof flashing. Adapting your maintenance approach ensures year-round protection.
Spring brings heavy rainfall and temperature swings. Inspect flashing after winter to identify damage from ice and snow. Additionally, check that spring storms haven’t loosened any components.
Summer heat expands metal flashing materials. This expansion can stress sealants and fasteners over time. However, summer also provides ideal conditions for repairs and replacements.
Fall preparation prevents winter problems. Clean debris before cold weather arrives and verify all sealants remain intact. Moreover, addressing minor issues now prevents ice dam complications later.
Winter ice creates unique threats to flashing integrity. Ice dams force water under flashing edges, causing leaks and damage. Therefore, proper insulation and ventilation become especially important during cold months.
This Old House offers comprehensive guides on seasonal roof maintenance, including detailed information about protecting flashing throughout the year.
Conclusion
Preventing roof flashing failure requires vigilance, quality materials, and professional expertise. Regular inspections catch problems early, while proper maintenance extends flashing lifespan significantly. Choosing appropriate materials for your climate and ensuring correct installation create strong foundations for long-term protection. Additionally, understanding warning signs allows you to address issues before they cause extensive damage. By implementing these strategies, you protect your home from water intrusion and avoid costly repairs. Remember that professional guidance from experienced contractors like Janowitz Roofing ensures your flashing system performs optimally for decades.
Frequently Asked Questions
How often should I inspect my roof flashing?
Inspect your roof flashing at least twice per year, ideally in spring and fall. Additionally, check after severe storms or heavy snowfall. Professional inspections every few years provide comprehensive assessments that homeowners might miss.
What is the average lifespan of roof flashing?
Most roof flashing lasts between 20 and 30 years with proper maintenance. However, premium materials like copper can last up to 70 years. Climate conditions and installation quality significantly affect longevity.
Can I repair roof flashing myself?
Minor repairs like reapplying sealant are manageable for experienced DIYers. However, extensive damage or replacement requires professional expertise. Improper repairs can create bigger problems and void warranties.
How much does roof flashing replacement cost?
Flashing replacement costs vary based on material choice, roof complexity, and location. Simple repairs might cost a few hundred dollars, while complete replacement can range from $500 to $3,000 or more.
What causes rust on roof flashing?
Rust develops when protective coatings wear away, exposing metal to moisture and oxygen. Additionally, contact between incompatible metals accelerates corrosion. Poor ventilation and standing water also contribute to rust formation.
Related Topics:
What Color to Paint House With Green Roof
Finding the Right Commercial Roofing Contractor in New Orleans